
DME Tuner© Setup & Files
To start using the DME Tuner©, we need to setup the software interface.
To begin download and install the PC application TunerPro. Note, this software requires Windows XP or newer. There are a couple of versions of TunerPro, the one we need is TunerPro RT. Download from here:
Go through the standard installation process, and remember the installation directory.
Now, to get TunerPro to work with the DME Tuner, we need to load a definition file into TunerPro. For the M-Tune, and NA-Tune, the definition file is different. Ensure you download the correct file for your application:
Save the definition file in the same directory as TunerPro.
Go ahead and start TunerPro. There is a wait screen when first starting. You are welcome to register the software, which removes the wait screen. Next, in TunerPro, click on 'XDF' and then 'Select XDF'. The XDF is the definition file, so navigate to where you saved the DME Tuner Definition file, and select it.
To get the software to display the definition values, click on 'View' then 'Show Parameter Tree' (or just hit F6). This should bring up a window on the left-hand side of the TunerPro window. Now again click on 'View' then 'Parameter Comments' (or hit F10). One more step is required to setup the definition file correctly. There is a pull-down menu in the left-hand window:

Cilck on this pull-down and select 'Parameter Category'. Now TunerPro should look very similar to this:
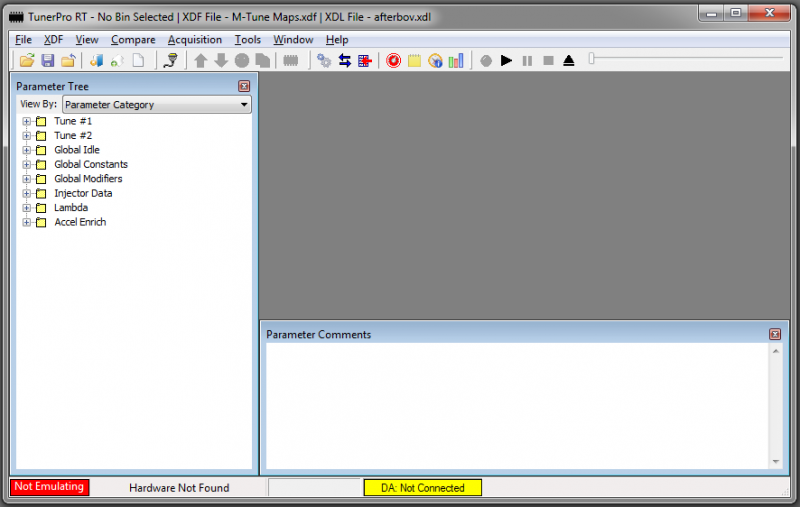
The TunerPro layout is now setup!!!
Next we need to load the actual maps & data which the DME Tuner uses:
The first step is to download the proper base-map. Because of the many different possible setups, we provide multiple base-maps based off of engine displacement and E85/Race-fuel for the secondary tune. Also, there is two versions of the M-Tune MAF pipe. The early pipe has a large raised "arrow" on the top-side of the MAF pipe, pointing towards the turbocharger. The current pipe has a much smaller arrow on the side of the MAF flange:
- M-Tune 2.5L E85 Or M-Tune 2.5L E85 Early
- M-Tune 2.5L Race Or M-Tune 2.5L Race Early
- M-Tune stroker E85 Or M-Tune stroker E85 Early
- M-Tune stroker Race Or M-Tune stroker Race Early
Download the appropriate base-map, and save it in the same directory as TunerPro.
Next, we need to load the base-map into TunerPro:
Select, 'File' then 'Open Bin'. Navigate to where you saved the base-map, and select it.
TunerPro now has loaded the base-map, and you should be able to see the different values by selecting one of the options from the left-hand side. For example, lets take a look at the Tune #1 Timing table:

Take notice that in the 'Parameter Comments' window at the bottom has the description for the active table/value. Every parameter has comments, which describe the table and its purpose.
The next, and last step to start using the DME Tuner is connecting to the actual DME Tuner hardware:
First, make sure the PC is connected to the internet, as it most likely need to download the appropriate driver files. Now, connect the USB cable from the DME Tuner to your PC. Windows will download and install the necessary driver to use the DME Tuner.
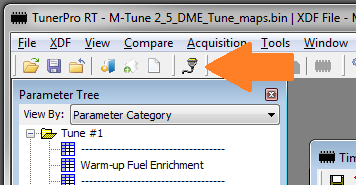
Once Windows is donw installing the software, we need to tell TunerPro to connect to the DME Tuner. To do this, click on the 'plug' in the toolbar:
If everything goes properly, you should see that TunerPro has connected the hardware:

Now the final step is uploading the base-map to the DME Tuner hardware. This is done using the upward-facing arrow:
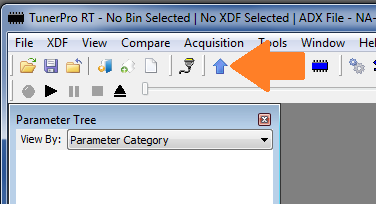
***NOTE - there is a down-arrow as well as the up-arrow. The down-arrow does not work correctly, so do not use this***
To adjust your Tune, make a change to a parameter, save the change, then upload to Tune to the DME.
For example, lets adjust the target idle RPM:

Make an ajustment to one of the table cell values. Then press the 'save' button to keep the change. Next, hit the up-arrow button to upload the change to the DME. Finally, if you want to save the base-map, select 'File' then 'Save Bin As...' - I suggest using a new name for the base-map (I usually include the date in the name). Additionally, you can upload the new base-map while the engine is running. There is usually no need to turn off the car before making changes.
That is it! You are now tuning your DME!
HAPPY TUNING!